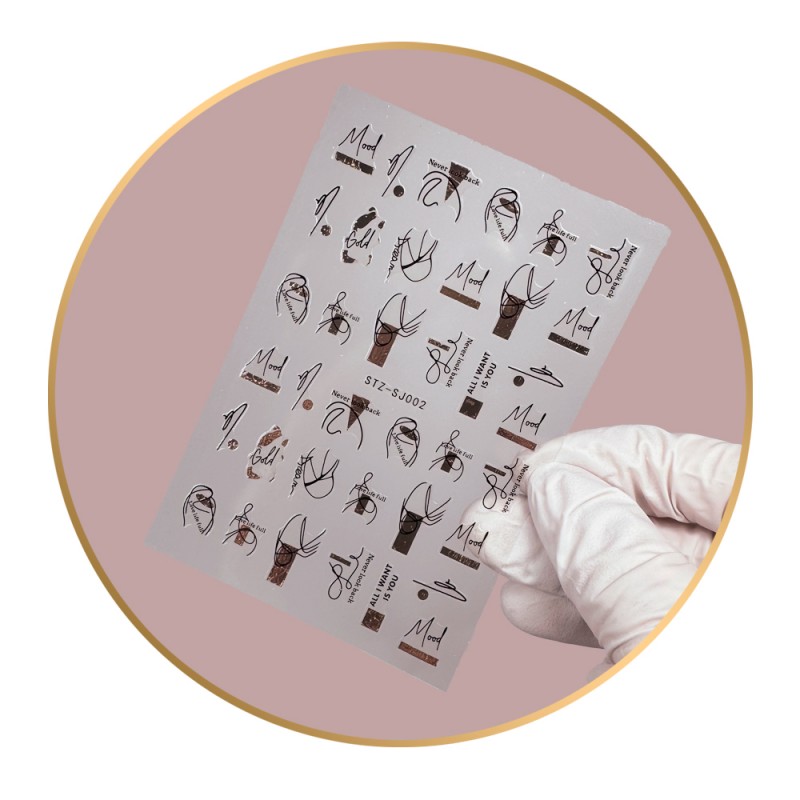
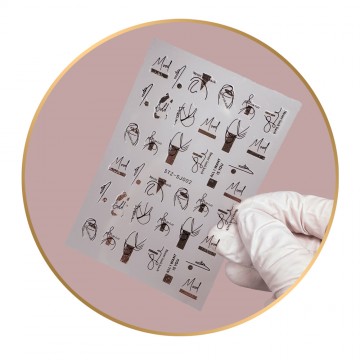

Ready2Stick - self-adhesive sticker used in artistic nail art. You can freely combine them with gels, gel polish or nail art decoration to create unique design.
Application:
Used:
Made in CN
Ready2Stick - self-adhesive sticker used in artistic nail art. You can freely combine them with gels, gel polish or nail art decoration to create unique design.
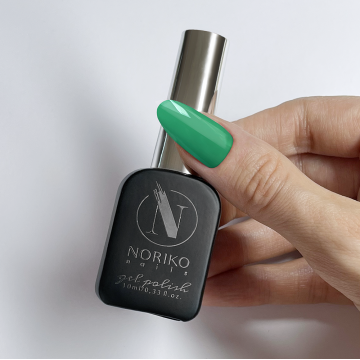
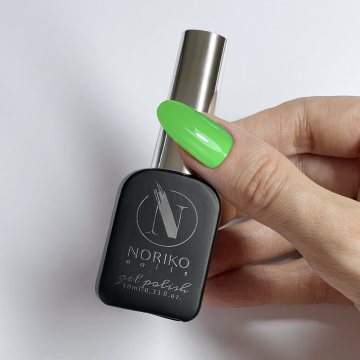
Emerald Green is a noble shade of intense green, which was often featured in the shows of famous fashion designers. This color will highlight the beauty of brunettes and red-haired beauties.
Noriko Nails Gel Polish have a high level of coverage and formula is free of HEMA and free of di-HEMA, which reduces the risk of allergies. There has the perfect viscosity for easy application and highly pigmented formula. The brush is rounded, which provided quickly and easy application around the cuticle area and lateral side walls.
Available in 10 ml
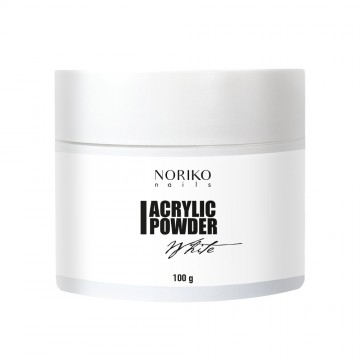
Acrylic Powder White is a white acrylic powder that provides a flawless white. Our powders will work well in salon work and for competition. Properly selected formula guarantees the highest quality of the product, which translates into durability and the final effect of styling. In combination with our Monomer, it creates a perfect network connection. Our acrylics are easy to apply and develop. They are suitable for working on natural plate, forms or tips. If you want to create a flawless French then this acrylic will meet your expectations.
100 g
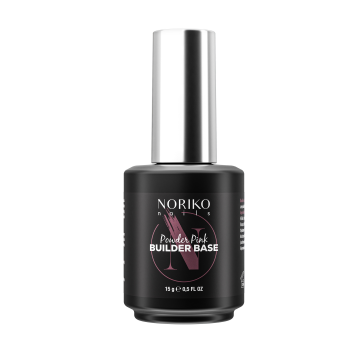
Builder Base Powder Pink - Gel in brush with a pink tone. It has a strong coverage, which allows you to hide all the imperfections of the nail plate. Suitable for pink and white manicure or as a single color.
Capacity: 15 ml.
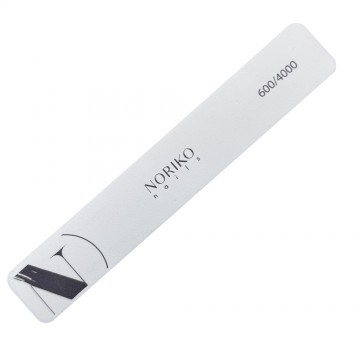
A white polisher with a 600/4000 grit made of the best quality paper and a durable sponge. It has a straight, wide shape and a reinforced centre. Ideal for polishing natural nails or acrylic nails to a very high shine. It does not colour during polishing. The polisher is packaged in foil.
1 piece
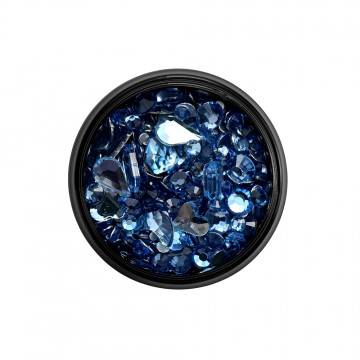
Neptune's Tears Rhinestone are glass crystals in the tone of precious sapphire, reminiscent of royal blue. They are perfect for both summer and winter designs, as well as for highlighting marine-inspired motifs. This color radiates strength, elegance, and prestige. The rhinestones come in a practical, resealable box, so you always have them at hand. Inside the set you’ll find: 100 classic round rhinestones in various sizes, 10 large irregular shapes. This combination allows you to create true nail jewelry – full of shine and unique character.
Mix Set: 110 pcs
10 irregular shapes + 100 round rhinestones in assorted sizes
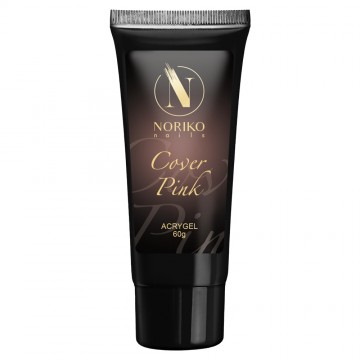
Acrygel Cover Pink is a camouflage. Acrygel - is a combination of acrylic durability and gel flexibility. It can be used on a natural plate, forms, lower and upper tips (dual form). It will work well in any salon styling and avant-garde. During work it guarantees 100% control over the product, it does not run off to the sides and is easy to apply.
Capacity: 60 g
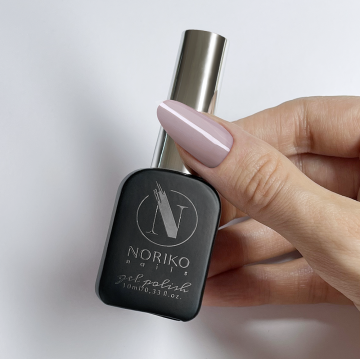
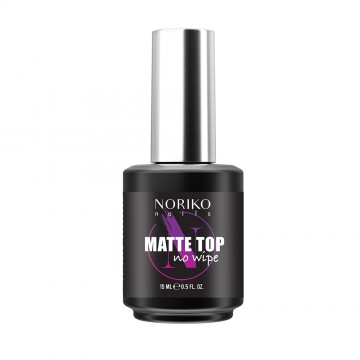
Shy Girl, which is a cool shade of extinguished beige that won't make your nails stand out and hitting our eye, but will make you feel comfortable for a long time.
Available in 10 mlNoriko Nails Gel Polis have a high level of coverage and formula is free of HEMA and free of di-HEMA, which reduces the risk of allergies. There has the perfect viscosity for easy application and highly pigmented formula. The brush is rounded, which provided quickly and easy application around the cuticle area and lateral side walls.
Available in 10 ml
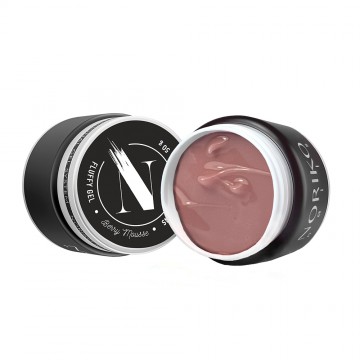
Fluffy Gel Berry Mousse is a professional hard builder gel with a self-leveling formula that guarantees smooth, easy application – without flooding the cuticles. Its medium-thick consistency offers complete control, making it ideal for building, extending, and sculpting even the most demanding shapes. Free from HEMA & TPO, it’s a safer choice for you and your clients. The shade Berry Mousse features a dark cover tone – a universal color that flatters most skin tones.
Available in: 15 g, 50 g
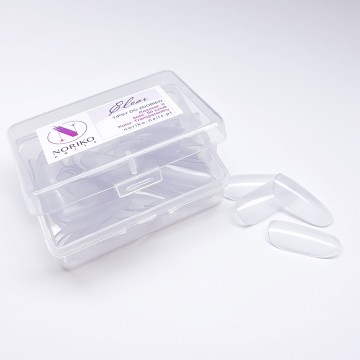
Transparent nail tips in size 0 designed to present decorations or colors. Tips are enclosed in a box for easy storage.
Color: Clear
Number of pieces in the box: 50 pieces
Size: 0
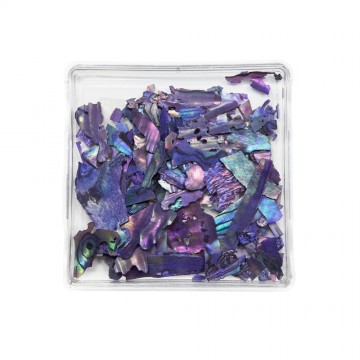
Violet Crushed Shell – crushed shell with an intense, pearlescent and iridescent shine. Its fragments shimmer in shades of violet, green, pink, and blue, creating an exceptionally elegant effect. Perfect for jewelry-style decorations, showpieces, enhancing artistic and competition works, as well as bridal and salon nail designs. Can be combined with transparent gels, glitter, rhinestones, or glass decorations.
11 g
Noriko Nails Gel Polish have a high level of coverage and formula is free of HEMA and free of di-HEMA, which reduces the risk of allergies. There has the perfect viscosity for easy application and highly pigmented formula. The brush is rounded, which provided quickly and easy application around the cuticle area and lateral side walls.
Available in 10 ml
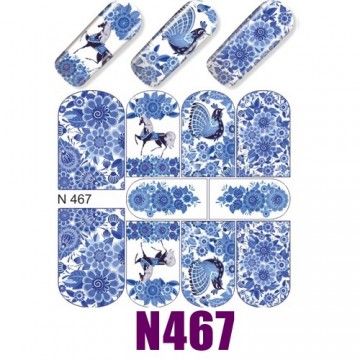
Tatuaż wodny - jest to łatwy i szybki sposób na ozdobienie paznokci skomplikowanymi wzorami graficznymi. Można je aplikować na lakier do paznokci, lakier hybrydowy Gelosophy lub EzFlow TruGel, a także na paznokcie żelowe bądź akrylowe.
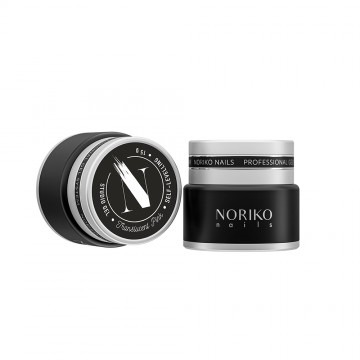
Studio Gel Translucent Pink – a hard builder gel in a cool pink shade. The gel is transparent, self-leveling, and holds the tunnel perfectly. It provides optimal adhesion even on problematic nail plates. Easy to apply and file. Perfect for creating thin yet durable nails.
Capacity: 15 g
Curing time: 90 seconds in LED lamp or 120 seconds in UV lamp.
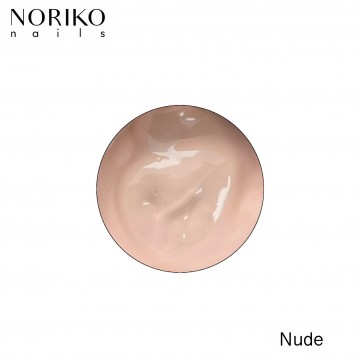
Nude Paint Gel NORIKO NAILS - a nude colour in warm tones. It can be used as a base, which can be blended with any colour to create different skin tones. You can tone the colours and achieve more pastel shades. Does not have an inhibition layer.
Total polymerisation time: 30 seconds
Capacity: 5g
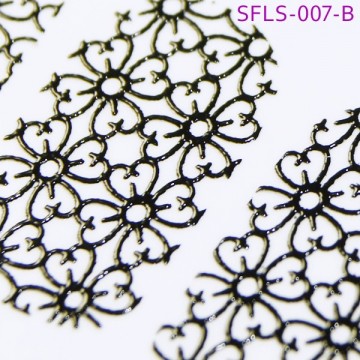
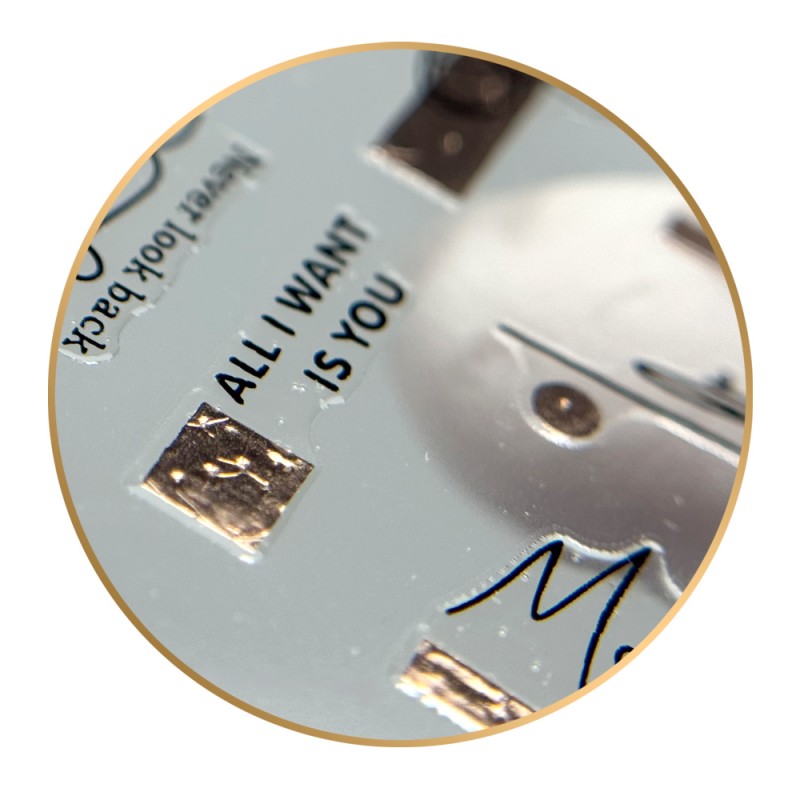
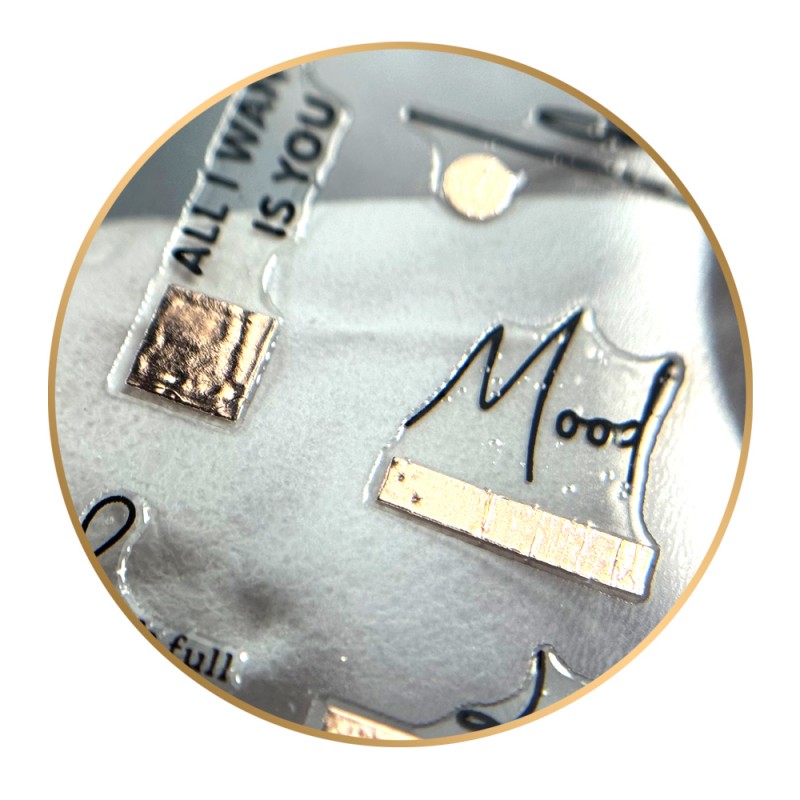
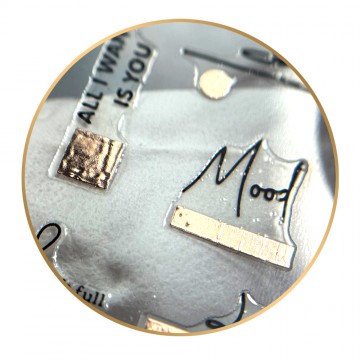
Filigranowe naklejki, zapewniające optymalną przyczepność, oraz najwyższą jakość produktu ! Imitują popularne dotychczas zdobienia wykonywane białym lub czarnym żelem, lub folią transferową w kolorze złota czy srebra.
kolor: czarny